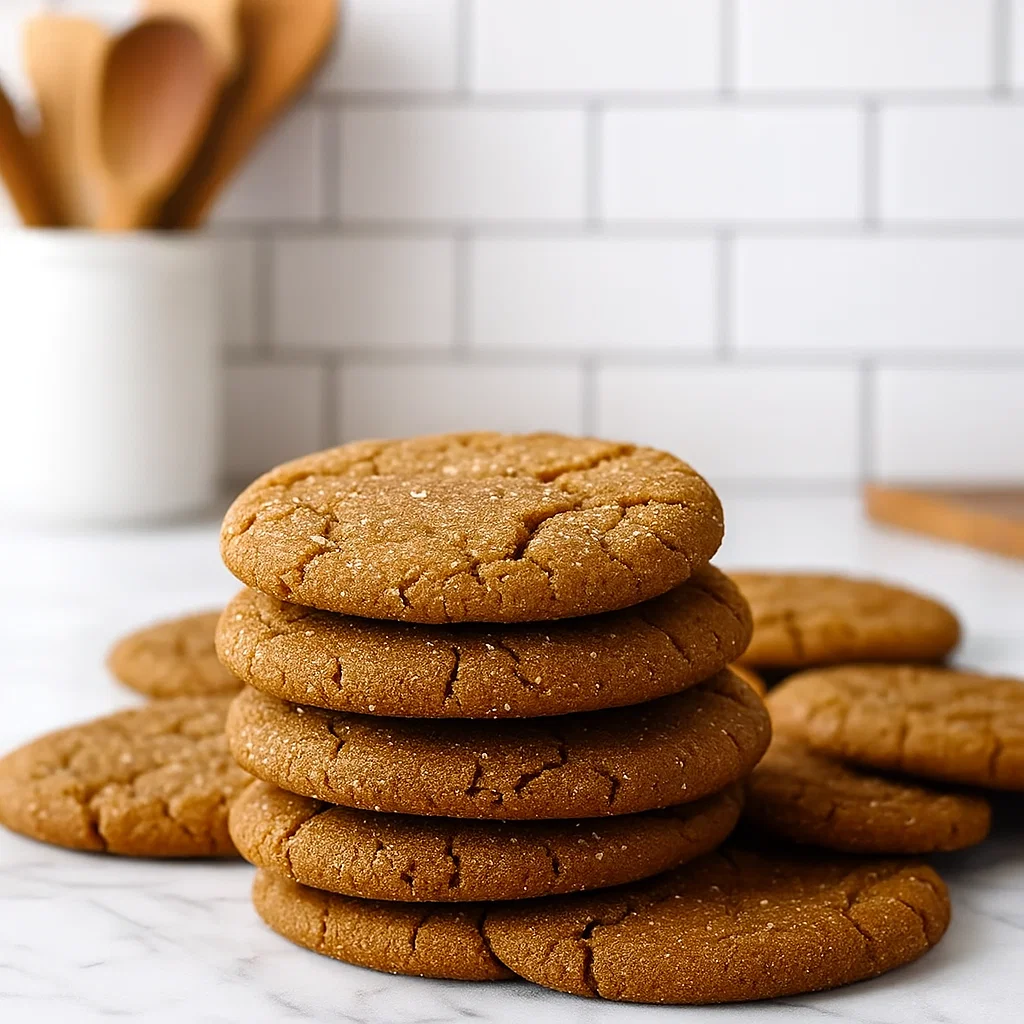
Bakery Style Molasses Cookies are like a warm hug from your favorite bakery, right in your own kitchen. These soft, chewy treats are packed with cozy spices and that deep, rich molasses flavor we crave when the weather turns cool. Think of them as the cookie version of your favorite fall sweater—comforting, timeless, and impossible not to love. Whether you’re baking for a cookie exchange, a family movie night, or just because you need something sweet with your coffee, this Bakery Style Molasses Cookie recipe hits the spot every single time. Plus, they’re simple enough for a weekday bake but special enough to impress at any holiday gathering.
Table of Contents
What is Bakery Style Molasses Cookies?
Bakery Style Molasses Cookies are the soft, chewy classic cookies that taste like they came straight from your favorite small-town bakery. They’re rich in flavor thanks to molasses—a dark, thick syrup made during the sugar-refining process—which gives these cookies that irresistible warmth and depth. Spiced with ginger, cinnamon, and cloves, they carry that nostalgic scent that fills your home with comfort. The dough is rolled in sugar before baking, creating that beautiful crackled finish everyone loves. The result? A cookie that’s crispy at the edges but pillowy in the middle. These cookies pair perfectly with a hot cup of tea, coffee, or even warm cider.
Reasons to Try Bakery Style Molasses Cookies
Why should you bake these Bakery Style Molasses Cookies? For starters, they’re everything a cookie should be—soft, chewy, and packed with flavor. Unlike store-bought cookies that can taste flat or overly sweet, these homemade beauties have a rich, spiced molasses flavor that feels like nostalgia in every bite. They also freeze well, making them a smart bake-ahead option for the holidays. Plus, your kitchen will smell amazing while they bake (seriously, you might just make them for the aroma alone). They’re perfect for gifting, cookie swaps, or pairing with something cozy like this Honey Butter Sweet Potato Cornbread for a comforting fall spread.
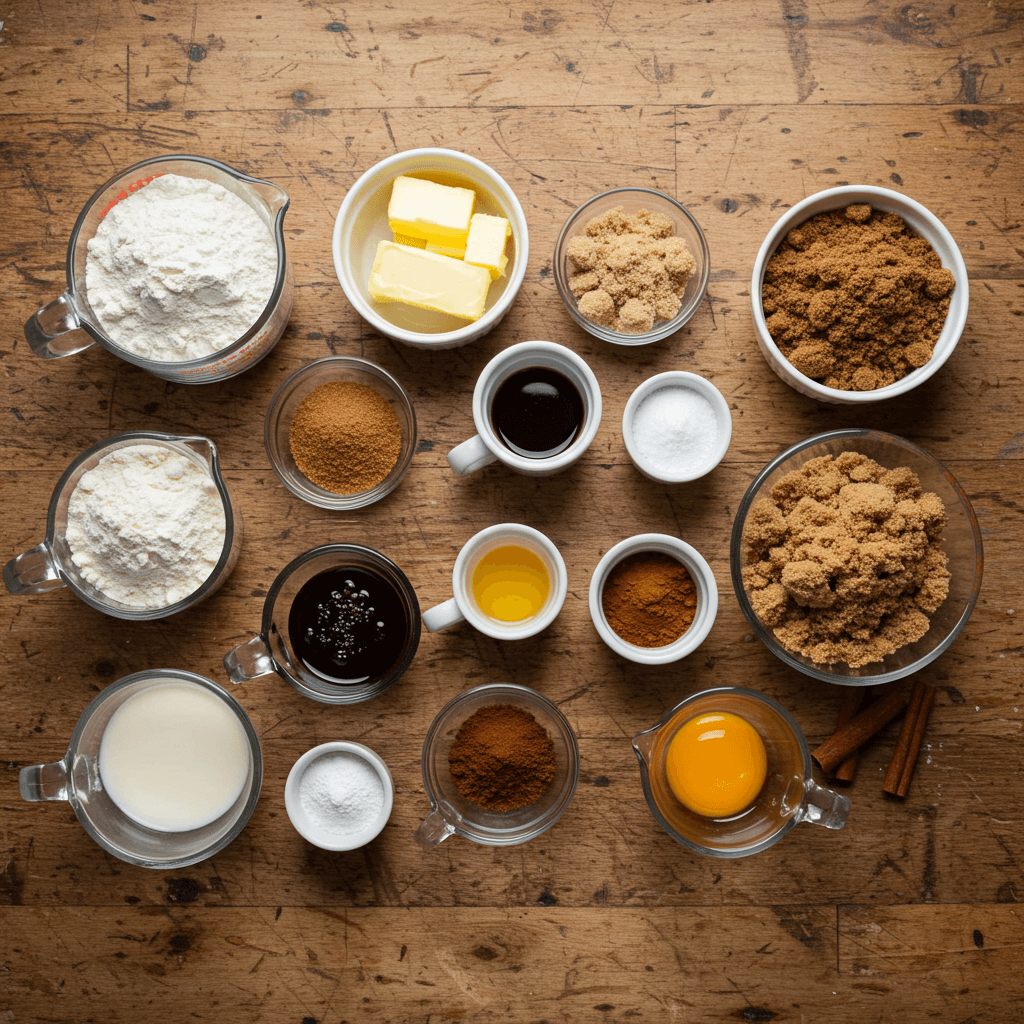
Ingredients Needed to Make Bakery Style Molasses Cookies
- 2 ¼ cups all-purpose flour
- ½ teaspoon salt
- ½ teaspoon baking soda
- 2 teaspoons ground ginger
- 1 teaspoon ground cinnamon
- ¼ teaspoon ground cloves
- ¾ cup unsalted butter, softened
- 1 cup brown sugar, packed
- 1 large egg
- ¼ cup unsulfured molasses
- 1 teaspoon vanilla extract
- ⅓ cup granulated sugar (for rolling)
Instructions to Make Bakery Style Molasses Cookies (Step by Step)
Ready to make your kitchen smell like a cozy bakery on a winter morning? This step by step guide will walk you through exactly how to make the most irresistibly soft and chewy Bakery Style Molasses Cookies. Every step is designed to help you get that perfect balance of rich molasses flavor, tender texture, and that signature sugar-crackled top.
Step 1: Prepare the Dry Ingredients
Start this step by step process by gathering a medium-sized mixing bowl. Combine the all-purpose flour, salt, baking soda, ground ginger, cinnamon, and cloves, then whisk them together until the spices are fully blended into the flour. This step might seem simple, but it’s the foundation of flavor for your cookies. Pre-mixing dry ingredients evenly distributes those warming spices so every bite tastes balanced—not too gingery, not too clovey, just perfectly cozy.
If you’d like to understand how different flours affect cookie texture, check out our Moist Sweet Cornbread post—it dives into how flour ratios impact softness and structure.
Step 2: Cream the Butter and Sugar
In a large mixing bowl, add your softened unsalted butter and packed brown sugar. Using an electric mixer on medium speed, cream them together for about 2–3 minutes, until the mixture turns light and fluffy. This step incorporates air into the dough, creating that signature bakery-style soft and chewy texture. The color will lighten slightly, and the sugar will begin to dissolve into the butter—signs that you’re on the right track.
If your butter isn’t soft enough, don’t melt it! Instead, learn the best way to bring butter to room temperature in our Texas Roadhouse Rolls guide—it makes a huge difference in baking consistency.
Step 3: Add the Wet Ingredients
Once your butter and sugar mixture looks fluffy, beat in the egg, molasses, and vanilla extract. This step by step phase is where the magic happens—the rich molasses deepens the dough’s color and fills your kitchen with that warm, old-fashioned aroma that reminds you of holiday baking. Make sure to scrape down the sides of your bowl as you mix to get everything evenly incorporated.
Molasses can vary in intensity—if you’re unsure which kind to use, try unsulfured molasses for a smoother, sweeter flavor. For more baking substitutions, visit our Maple Glazed Apple Recipe where we explore alternative sweeteners that keep desserts flavorful but balanced.
Step 4: Combine Wet and Dry Ingredients
Now, slowly add your dry ingredients to the wet mixture, one-third at a time, while mixing on low speed. Continue until a soft dough forms. Be careful not to overmix—doing so can develop too much gluten and make your cookies tough instead of tender. The dough should feel sticky yet pliable and slightly glossy from the molasses.
This step by step blending process ensures that every cookie bakes evenly. If your dough feels too soft to handle, don’t worry; chilling it next will solve that.
Step 5: Chill the Dough
Cover your bowl tightly with plastic wrap and refrigerate the dough for at least 1 hour. This is one of the most important step by step parts of this recipe. Chilling allows the butter to firm up again, which prevents excessive spreading in the oven. It also gives the flavors time to deepen, enhancing that signature molasses-spice profile.
While waiting, you can prepare another easy treat like our Honey Butter Skillet Corn to round out your baking session—it’s a sweet and savory side dish that pairs beautifully with desserts.
Step 6: Preheat the Oven and Prepare Baking Sheets
After your dough has chilled, preheat your oven to 350°F (175°C). Line two baking sheets with parchment paper to prevent sticking and help the cookies bake evenly. Preheating is a vital step by step baking technique because it guarantees the cookies start baking at the right temperature, giving them that perfectly soft center and crisp edge.
Step 7: Shape and Sugar-Coat the Dough
Scoop about 1 tablespoon of chilled dough and roll it between your palms to form a smooth ball. Then roll each ball generously in granulated sugar until fully coated. This simple step by step detail gives your cookies their irresistible crackly tops and a touch of sparkle once baked.
If you’re baking for kids or a holiday party, you can add a fun twist by using coarse sparkling sugar for extra crunch and shine—just like we do in our festive Caramel Apple Cookies.
Step 8: Bake the Cookies
Place the sugar-coated dough balls about 2 inches apart on your prepared baking sheets. Bake for 8–10 minutes, or until the edges are set but the centers still look slightly soft. This is the secret step by step trick for chewy cookies—don’t wait until they look fully baked, or you’ll end up with crunchy instead of soft. The residual heat will finish cooking them perfectly on the pan.
Step 9: Cool and Serve
Remove the baking sheets from the oven and let the cookies cool for 5 minutes before transferring them to a wire rack. This final step by step cooling phase lets them set while staying chewy inside. Once completely cooled, pour yourself a cup of tea or coffee, grab a warm cookie, and enjoy the taste of bakery perfection.
Chill the Dough
Cover the bowl with plastic wrap and chill in the refrigerator for at least one hour. This step deepens the flavor and keeps your cookies from spreading too much while baking.
Shape and Roll
Preheat the oven to 350°F (175°C). Line two baking sheets with parchment paper. Scoop about 1 tablespoon of dough, roll it into a ball, and then roll it in granulated sugar to coat. Place on the prepared sheets about 2 inches apart.
Bake and Cool
Bake for 8–10 minutes, just until the edges look set and the centers still look soft. Don’t overbake! The cookies will continue to firm up as they cool. Let them rest on the baking sheet for 5 minutes, then transfer to a wire rack.
For an extra treat, serve these alongside a warm drink like spiced cider or check out our Caramel Apple Cookies for another cozy cookie day favorite.
What to Serve with Bakery Style Molasses Cookies
These cookies are the ultimate cozy companion. Enjoy them with a mug of creamy hot chocolate, or pair them with a chai latte for the ultimate fall indulgence. They also complement savory dishes beautifully—think Apple Cider Glazed Turkey Breast or Texas Roadhouse Rolls for a sweet finish to a hearty meal. If you’re hosting, serve them on a dessert board with mini brownies, fudge, or candied nuts. For a holiday twist, sandwich them with vanilla buttercream for homemade molasses cookie sandwiches. However you serve them, these cookies bring a touch of bakery magic to your table.
Key Tips for Making Bakery Style Molasses Cookies
- Don’t skip the chilling time. It’s essential for flavor and shape.
- Use room-temperature butter and egg. It helps everything mix evenly.
- Roll in sugar generously. That sparkly crackled top is part of the charm.
- Don’t overbake. They should look slightly soft in the center when you pull them out.
- Store correctly. These cookies actually taste even better the next day after the flavors meld.
Want another make-ahead favorite? Check out our No-Bake Pumpkin Cheesecake Balls for another crowd-pleaser that’s big on flavor, low on fuss.
Storage and Reheating Tips for Bakery Style Molasses Cookies
Store your cooled cookies in an airtight container at room temperature for up to 5 days. To keep them soft, place a slice of bread inside the container—the cookies will absorb the moisture and stay tender. If freezing, separate layers with parchment paper and freeze for up to 3 months. When you’re ready to enjoy them again, let them thaw at room temperature or warm them for 10 seconds in the microwave for that fresh-baked softness. They’ll taste just as incredible as the day you made them.
FAQs
Can I use dark molasses instead of unsulfured?
Yes, but dark molasses gives a bolder, slightly bitter flavor. Unsulfured molasses is smoother and sweeter.
Do I need to chill the dough?
Yes! It helps control spreading and intensifies flavor.
Can I make them gluten-free?
Absolutely—just use a 1:1 gluten-free all-purpose flour blend.
Why are my cookies flat?
The dough may have been too warm. Next time, chill longer before baking.
Final Thoughts
These Bakery Style Molasses Cookies are proof that simple ingredients can create something truly special. Soft, chewy, and warmly spiced, they taste like the holidays but are perfect any time of year.
Visit our Pinterest for regular slow cooker recipe updates, or join our Facebook discussions where cooking fans exchange their favorite hearty meal ideas.
Print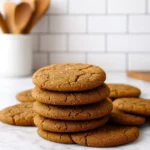
Bakery Style Molasses Cookies (Soft & Chewy)
- Prep Time: 15 minutes
- Cook Time: 10 minutes
- Total Time: 1 hour 25 minutes
- Yield: 24 cookies 1x
- Category: Dessert, Snack
- Method: Baking
- Cuisine: American
- Diet: Vegetarian
Description
This Bakery Style Molasses Cookie recipe brings classic flavor and soft, chewy texture straight to your kitchen! Featuring warming spices, rich molasses, and a sugar-crackled finish, these cookies are easy to make and perfect for holiday gatherings or everyday treats.
Ingredients
- 2 ¼ cups all-purpose flour
- ½ teaspoon salt
- ½ teaspoon baking soda
- 2 teaspoons ground ginger
- 1 teaspoon ground cinnamon
- ¼ teaspoon ground cloves
- ¾ cup unsalted butter, softened
- 1 cup brown sugar, packed
- 1 large egg
- ¼ cup unsulfured molasses
- 1 teaspoon vanilla extract
- ⅓ cup granulated sugar, for rolling
Instructions
1. In a medium bowl, sift together the flour, salt, baking soda, ground ginger, cinnamon, and cloves. Set aside.
2. In a large mixing bowl, cream together the softened butter and brown sugar using an electric mixer on medium speed until light and fluffy, about 2-3 minutes.
3. Beat in the egg, molasses, and vanilla extract until smooth and fully incorporated.
4. Gradually add the dry ingredients to the wet mixture, mixing on low speed until a soft dough forms. Be careful not to overmix.
5. Cover the dough with plastic wrap and refrigerate for at least 1 hour. This step is important to enhance flavor and prevent excessive spreading during baking.
6. Preheat your oven to 350°F (175°C). Line two baking sheets with parchment paper.
7. Scoop about 1 tablespoon of dough and roll it into a ball. Roll each ball in granulated sugar to coat, and place it on the prepared baking sheet, leaving about 2 inches of space between cookies.
8. Bake in the preheated oven for 8-10 minutes. The cookies will look slightly soft and underbaked in the center when you remove them, but they will firm up as they cool.
9. Allow the cookies to cool on the baking sheet for 5 minutes before transferring to a wire rack to cool completely. Enjoy!
Notes
To keep cookies soft for days, store them in an airtight container with a slice of bread. You can also freeze the dough balls for up to 3 months—just bake from frozen and add a minute or two to the baking time.
Nutrition
- Serving Size: 1 cookie
- Calories: 120
- Sugar: 10g
- Sodium: 80mg
- Fat: 6g
- Saturated Fat: 3.5g
- Unsaturated Fat: 2g
- Trans Fat: 0g
- Carbohydrates: 17g
- Fiber: 0.5g
- Protein: 1g
- Cholesterol: 20mg