Green Velvet Brownies with Cream Cheese Frosting are the ultimate St. Patrick’s Day treat — soft, fudgy, and gloriously topped with a tangy cream cheese frosting that’s pure gold (well, metaphorically). Whether you’re baking for a festive party or just want an excuse to eat something deliciously green, these brownies check every box. They’re simple to make, taste like chocolate heaven, and are guaranteed to brighten any dessert table. Plus, they’re a fun way to add a pop of color to your celebrations without any complicated steps or fancy ingredients.
Table of Contents
What is Green Velvet Brownies with Cream Cheese Frosting?
Imagine everything you love about a rich red velvet cake but transformed into a dense, fudgy brownie that’s decked out in green. These Green Velvet Brownies with Cream Cheese Frosting bring together the chocolatey depth of a brownie and the soft, velvety texture of cake, all crowned with smooth, sweet cream cheese frosting. They’re like your favorite red velvet cousin that decided to go all-out for St. Patrick’s Day. The vibrant color comes from green food coloring, giving them that eye-catching hue that’s both playful and festive. Perfect for parties, bake sales, or an afternoon pick-me-up, these brownies are a hit with kids and adults alike.
Reasons to Try Green Velvet Brownies with Cream Cheese Frosting
If you’re someone who loves both chocolate and cheesecake, this dessert is your dream come true. For one, these Green Velvet Brownies with Cream Cheese Frosting are incredibly easy to make — no fancy baking skills required. You melt, mix, bake, and frost. That’s it! Secondly, the flavor combo is divine: rich chocolate with the creamy tang of frosting is the stuff dessert dreams are made of. And let’s be real, it’s fun to make something festive and different, especially around the holidays. They’re also a guaranteed crowd-pleaser — whether you’re hosting a St. Patrick’s Day dinner or just want to surprise your coworkers with something colorful and tasty.
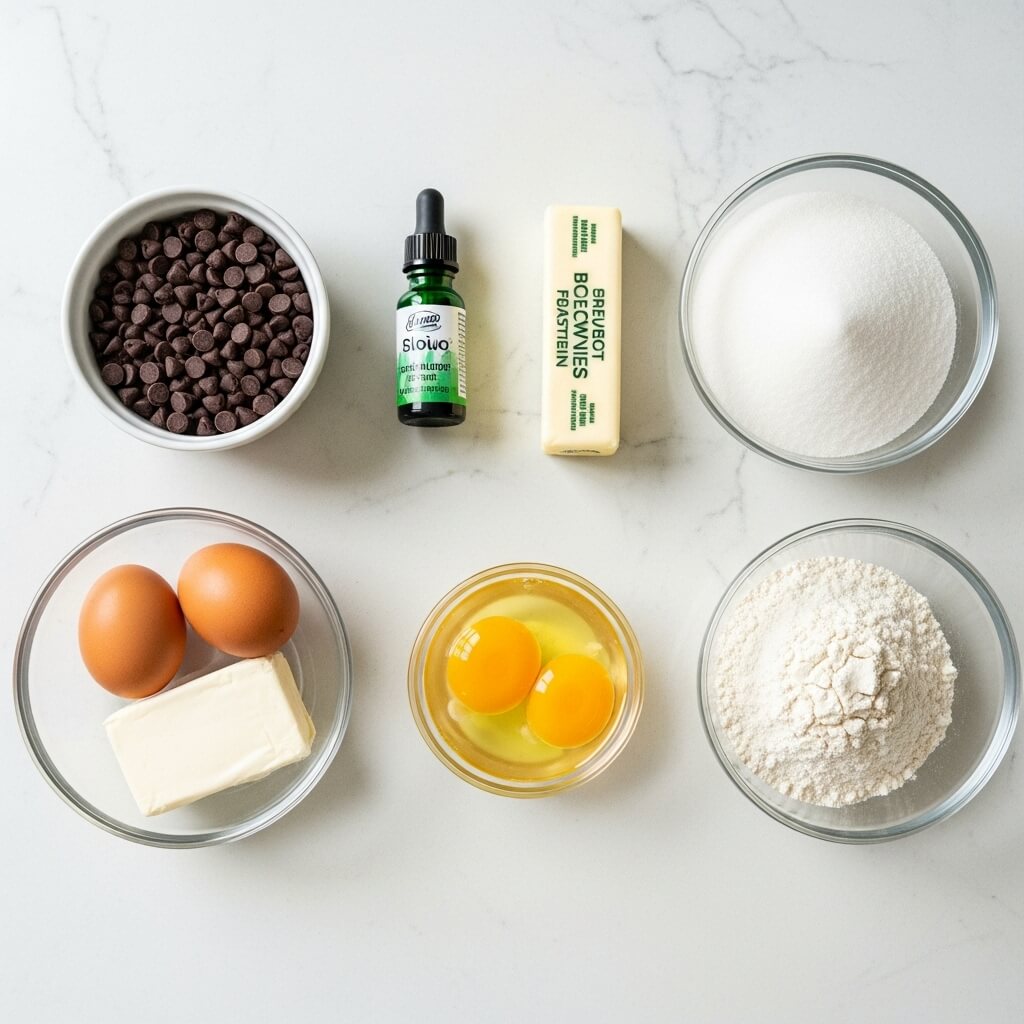
Ingredients Needed to Make Green Velvet Brownies with Cream Cheese Frosting
For the Brownies:
- ¾ cup semi-sweet chocolate chips
- ¾ cup butter
- 2 cups sugar
- 4 large eggs
- 1½ cups all-purpose flour
- 1 (1-oz) bottle green liquid food coloring
- 1½ tsp baking powder
- 1 tsp vanilla extract
- ⅛ tsp salt
For the Cream Cheese Frosting:
- 1 (8-oz) package cream cheese, softened
- 3 Tbsp butter, softened
- 1½ cups powdered sugar
- ⅛ tsp salt
- 1 tsp vanilla extract
Instructions to Make Green Velvet Brownies with Cream Cheese Frosting
Ready to create something that’s equal parts festive and irresistible? This step-by-step guide will walk you through making the most eye-catching dessert for St. Patrick’s Day — Green Velvet Brownies with Cream Cheese Frosting. Each step is simple, fun, and designed to help even beginner bakers turn out perfect brownies with that dreamy, velvety texture. Let’s dive right in.
Step 1: Prep Your Pan Like a Pro
Before you even think about chocolate, start by preheating your oven to 350°F (175°C). This temperature gives your brownies that ideal balance — fudgy in the middle and lightly crisp around the edges. Line a 9-inch square baking pan with aluminum foil, leaving a couple of inches hanging over the sides (you’ll thank yourself later when you’re lifting the brownies out). Lightly grease the foil with butter or non-stick spray to prevent sticking.
Pro Tip: Using a metal pan (instead of glass) helps your brownies bake more evenly and gives you those slightly chewy edges everyone loves. If you’ve ever wondered why some brownies bake better than others, check out our St. Patrick’s Day Brownie Trifle Step-by-Step Guide — it explains how pan type affects texture and moisture.
Step 2: Melt the Chocolate and Butter
In a large microwave-safe bowl, combine ¾ cup of semi-sweet chocolate chips and ¾ cup of butter. Microwave on HIGH for 1½ to 2 minutes, stirring every 30 seconds until the mixture is smooth and glossy. The chocolate should be fully melted but not overheated — think silky, not sizzling.
If you prefer the stovetop method, melt the two together over low heat using a double boiler. Just keep stirring to prevent burning.
Step-by-Step Tip: Once melted, let the mixture cool slightly for a few minutes before adding sugar and eggs — this keeps the eggs from scrambling (no one wants that surprise in their brownies).
Step 3: Mix in Sugar and Eggs
Now, whisk in 2 cups of sugar until fully dissolved and the mixture takes on a shiny, caramel-like texture. Add 4 large eggs, one at a time, whisking gently after each addition. You want the batter to be smooth but not overmixed — that’s the secret to rich, dense brownies instead of a cakey texture.
This is also the perfect time to add 1 teaspoon of vanilla extract for that subtle warmth and depth. For more flavor layering ideas, peek at our Chocolate Mint Cream Cheese Buttons — they use a similar flavor pairing that’s pure dessert magic.
Step 4: Add the Dry Ingredients and Green Food Coloring
In a separate bowl, whisk together 1½ cups of all-purpose flour, 1½ teaspoons of baking powder, and ⅛ teaspoon of salt. Gradually fold these dry ingredients into your wet mixture until combined. Then, it’s time for the star of the show — that 1-ounce bottle of green food coloring.
Pour it in and stir slowly to reveal that vibrant emerald hue. It’s oddly satisfying — like watching a little leprechaun magic swirl through your batter. The color should be bold but smooth throughout. If you’d rather avoid artificial dyes, you can use natural alternatives like spinach or matcha powder; our Shamrock Swirl Pie Recipe offers a few creative options for achieving festive color naturally.
Step 5: Pour and Bake
Once your batter is evenly mixed, pour it into your prepared pan and use a spatula to spread it out smoothly. Bake for 44–48 minutes, or until a wooden toothpick inserted into the center comes out with a few moist crumbs. (If it comes out clean, they’re overbaked; if it’s wet, they need more time.)
Step-by-Step Reminder: Every oven is different, so start checking around the 42-minute mark. The edges should be set and slightly pulling away from the sides of the pan, but the center should still look just a bit soft.
When they’re done, place the pan on a wire rack and let the brownies cool completely — about 2 hours. Patience here is key because frosting warm brownies leads to one melty, messy situation.
Step 6: Make the Cream Cheese Frosting
In a medium mixing bowl, beat 1 (8-ounce) package of softened cream cheese and 3 tablespoons of softened butter together using a hand mixer at medium speed. Mix until creamy and lump-free. Slowly add 1½ cups of powdered sugar and ⅛ teaspoon of salt, then finish by mixing in 1 teaspoon of vanilla extract.
Your frosting should be smooth, thick, and slightly tangy — the perfect contrast to those rich green brownies. If you like your frosting extra fluffy, whip for an additional 30 seconds.
Step-by-Step Shortcut: Want to add a twist? You can mix in a drop or two of mint extract for a fresh spin, similar to our crowd-favorite Mint Oreo Balls Recipe.
Step 7: Assemble and Frost
Once the brownies are completely cool, lift them from the pan using the foil edges. Gently peel the foil away and place the brownies on a flat surface. Spread the cream cheese frosting evenly across the top using an offset spatula or butter knife.
To make them picture-perfect, smooth the frosting in gentle strokes or swirl it for a rustic look. You can even sprinkle on green sanding sugar or mini chocolate chips for an extra festive flair.
Step-by-Step Finishing Tip: If you love layered desserts, save a few brownie squares to crumble into your next Brownie Trifle — it’s a fun way to stretch your batch into another dessert!
Step 8: Slice and Serve
Cut the brownies into 16 squares with a sharp knife, wiping the blade clean between cuts for those neat, bakery-style edges. Serve them at room temperature for the best flavor and texture.
These brownies are rich, decadent, and oh-so-worth the little bit of effort. Whether you’re baking for a party or just treating yourself, this step-by-step recipe guarantees fudgy perfection every time.
What to Serve with Green Velvet Brownies with Cream Cheese Frosting
These brownies are rich and luscious, so you can balance them with lighter sides. Serve with a scoop of vanilla ice cream for a creamy contrast or alongside a hot cup of coffee or Irish cream latte. If you’re hosting, serve them after a comforting dinner like Chicken and Gravy or a cozy Dutch Oven Pot Roast. For a dessert table, they also pair beautifully with Mint Oreo Balls or Chocolate Mint Cream Cheese Buttons.
Key Tips for Making Green Velvet Brownies with Cream Cheese Frosting
- Use a metal pan — it gives your brownies that crisp edge and chewy center.
- Go bold with the color. The full bottle of green food coloring gives you that festive, vivid hue — half measures lead to dull brownies.
- Cool completely before frosting. If they’re even a little warm, your frosting will melt into a sad puddle.
- Mix gently. Overmixing makes brownies tough, and no one wants that.
- Try adding chocolate chips or even white chocolate chunks for extra richness.
Storage and Reheating Tips for Green Velvet Brownies with Cream Cheese Frosting
Store cut brownies in an airtight container for up to 2 days at room temperature or 4 days in the fridge. For longer storage, freeze unfrosted brownies for up to 3 months — wrap tightly in plastic wrap and foil. When ready to serve, thaw overnight, frost, and enjoy. You can warm them slightly in the microwave for 10 seconds if you prefer a gooey texture (trust me, it’s worth it).
FAQs
Can I use gel food coloring instead of liquid? Yes, just use less since gel is more concentrated.
Can I double the recipe? Absolutely — use a 9×13 pan and adjust the bake time to around 50–55 minutes.
Can I make these without the frosting? You can, but why would you? The cream cheese layer is the perfect sweet-tangy balance to the chocolate base.
Final Thoughts
These Green Velvet Brownies with Cream Cheese Frosting are festive, delicious, and surprisingly simple to make. Perfect for St. Patrick’s Day, spring gatherings, or any time you want a dessert that looks as fun as it tastes. Whether you’re baking for friends or indulging solo, these brownies deliver comfort, flavor, and a little holiday magic in every bite.
Visit our Pinterest for regular slow cooker recipe updates, or join our Facebook discussions where cooking fans exchange their favorite hearty meal ideas.
Print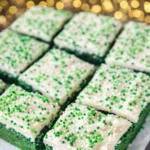
Green Velvet Brownies with Cream Cheese Frosting
- Prep Time: 10 minutes
- Cook Time: 35 minutes
- Total Time: 45 minutes
- Yield: 16 brownies 1x
- Category: Dessert
- Method: Baking
- Cuisine: American
Description
Green Velvet Brownies with Cream Cheese Frosting – perfect for St. Patrick’s Day! Delicious homemade brownies topped with cream cheese frosting. Super easy to make and even easier to eat!
Ingredients
- Brownies:
- ¾ cup semi-sweet chocolate chips
- ¾ cup butter
- 2 cups sugar
- 4 large eggs
- 1½ cups all-purpose flour
- 1 (1-oz) bottle green liquid food coloring
- 1½ tsp baking powder
- 1 tsp vanilla
- ⅛ tsp salt
- Cream Cheese Frosting:
- 1 (8-oz) package cream cheese, softened
- 3 Tbsp butter, softened
- 1½ cups powdered sugar
- ⅛ tsp salt
- 1 tsp vanilla extract
Instructions
1. Preheat oven to 350°F. Line bottom and sides of a 9-inch square pan with aluminum foil, allowing 2 to 3 inches to extend over sides; lightly grease foil.
2. Microwave chocolate chips and butter in a large microwave-safe bowl at HIGH 1-1/2 to 2 minutes or until melted and smooth, stirring at 30-second intervals.
3. Whisk in sugar. Add eggs, one at a time, whisking just until blended after each addition. Gently stir in flour, green food coloring, baking powder, vanilla, and salt. Pour mixture into prepared pan.
4. Bake for 44 to 48 minutes or until a wooden pick inserted in the center comes out with a few moist crumbs. Cool completely on a wire rack (about 2 hours).
5. For the frosting: Beat cream cheese and butter at medium speed with an electric mixer until creamy. Gradually add powdered sugar and salt, beating until blended. Stir in vanilla.
6. Lift brownies from pan, using foil sides as handles; gently remove foil. Spread Cream Cheese Frosting on top of brownies, and cut into 16 squares. Garnish, if desired.
Notes
For best results, use a metal cake pan.
A full 1-oz bottle of green food coloring gives the vibrant green color.
You can substitute a 4-oz bittersweet chocolate bar for the chocolate chips.
Cut brownies will keep 1 to 2 days in an airtight container; uncut brownies up to 4 days when tightly wrapped.
Brownies can be frozen (unfrosted) for up to 3 months. Thaw, frost, and cut before serving.
Nutrition
- Serving Size: 1 brownie
- Calories: 320
- Sugar: 28g
- Sodium: 150mg
- Fat: 18g
- Saturated Fat: 10g
- Unsaturated Fat: 7g
- Trans Fat: 0g
- Carbohydrates: 38g
- Fiber: 1g
- Protein: 3g
- Cholesterol: 60mg